Welcome to securityCRUSH

Welcome to the securityCRUSH blog, a place where you can find random musings as well as postings relevant to information security, penetration testing, and my latest projects - Daniel Wood.

Thursday, March 8, 2012

Intro to Cryptography (Part 3)

XOR, otherwise known as the logical operation exclusive disjunction or just “exclusive or” in short; is a type of logical operation for two operands that will always result in the value of TRUE if at least one of the operands holds a TRUE value.  If you've taken algebra, this should be somewhat familiar to you…at least in principle.

A XOR cipher (additive) encryption is extremely resistant to brute force attacks which makes it a great method, however, it does have some inherent weaknesses due to the use of patterns.  Compression can help prevent pattern susceptibility.

To demonstrate this, we can look at what we would call a Truth Table (related to what is called a Cayley Table).

XOR Truth Table
Input Output
 A B
 0 0    0
 0 1    1
 1 0    1
 1 1    0

The XOR of A and B can be written out several ways; A⊗B, A XOR B, or A≠B

Binary XOR has two operands (or inputs) like the above Truth Table; where the inputs to a binary XOR table can only be 0 or 1.  The singular output of the combination of each pair of inputs likewise can only be a 0 or 1 (this is binary).To demonstrate this, let’s take two inputs, A and B, and denote the output as C below.

A     B C
0 XOR 0 0
0 XOR 1 1
1 XOR 0 1
1 XOR 1 0

As mentioned above, we are of course using only 0’s and 1’s for carrying out this binary operation.  If we have two binary numbers that we want to conduct a XOR for we would have something like the following:

binary 1 - 10110110
              XOR
binary 2 - 11001101
Result     01111011

Applying XOR to real world use.  A string of text can be used as an input into the XOR operation by applying bitwise XOR to every character within the string using an encryption key.  Decrypting the XOR’d string, you reapply the XOR with the encryption key used and it will remove the cipher from your string - thus decrypting your plain-text.

Example:
Let’s say we have our password, which will be “password”

Converting our password to 8-bit ASCII binary:

01110000 01100001 01110011 01110011 01110111 01101111 01110010 01100100

Our password (sic) is made up of 8 characters, as you can see in the above binary, there are 8 groupings of 8 digits.  As we know, 8-bits = 1 byte.  This gives us an 8-byte password (64-bits).  Now we want to encrypt our password with our encryption key.  For the sake of this example, I will inverse our password, making our encryption key “drowssap”:

Converting our key to 8-bit ASCII binary:

01100100 01110010 01101111 01110111 01110011 01110011 01100001 01110000

Now that we have our plain-text password string to encrypt with our key, we will use XOR to encrypt it:


Input:  01110000 01100001 01110011 01110011 01110111 01101111 01110010 01100100
Key:    01100100 01110010 01101111 01110111 01110011 01110011 01100001 01110000
Result: 00010100 00010011 00011100 00000100 00000100 00011100 00010011 00010100

The result is now our encrypted text.  To decrypt our text we will just carry out the XOR again against the key, this time our Input will be our encrypted string:


Input:  00010100 00010011 00011100 00000100 00000100 00011100 00010011 00010100
Key:    01100100 01110010 01101111 01110111 01110011 01110011 01100001 01110000
Result: 01110000 01100001 01110011 01110011 01110111 01101111 01110010 01100100

Resulting in -bit ASCII that when converted back to plaintext = “password”

As you should be able to deduce, the XOR operator is vulnerable to attack using a know-plaintext attack of plaintext XOR ciphertext = encryption key.

This concludes part 3 of Intro to Cryptography.  In part 4, we will go into the basics of Public Key Infrastructure (PKI), implementations of PKI and perhaps introduce another topic.  If there’s anything you want to see in this series, please leave a comment and let me know if you need help understanding anything I’m covering.
Tuesday, February 28, 2012

Intro to Cryptography (Part 2)

Last time I introduced cryptography, how it works, as well as some basic algorithms.  I don’t want to spend too much time on the basics, as I figure that knowing what plaintext and ciphertext are should be good enough to get you started.  Part 2 is going to focus on more advanced topics that may be complicated at first, but are generally easy to understand.  Now that we understand what encryption is, we need to know that cryptography can be either strong or weak.  To determine the strength of a type of encryption, we measure how long and how many resources it would take to break the encryption.  

When reading about encryption elsewhere, you may have heard of bits, bytes and words. Measuring an encryption standard for strength is noted by the amount of cryptographic bits used to encrypt the data.

Here are a few more definitions you should get acquainted with:

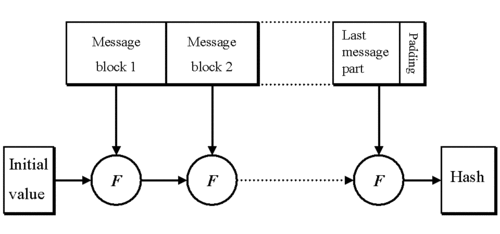
Hashing: or the process of running data as an input through a hash function returns a fixed-size string, also known as the hash value.

Within cryptography, hash functions have the following basic requirements:
  • Input can be of any length
  • Output (the hash) has a fixed length
  • Hashing is one way, collision-free and is easy to compute for any given x; where H(x).
 (where F = a compression function)

Common Hashes
Hashing algorithm       Hash size
MD5                     16 bytes (128 bits)
SHA-1                   20 bytes (160 bits)
SHA-256                 32 bytes (256 bits)
SHA-384                 48 bytes (384 bits)
SHA-512                 64 bytes (512 bits)

Block ciphers
A type of symmetric encryption, rely on manipulating larger blocks of data (hence the name) during the encryption phase than stream ciphers.  by design, block ciphers are inherently slower than stream ciphers.

Block ciphers work by taking a fixed-length block of plaintext and encrypting it into a block of ciphertext.  These blocks are measured by their fixed length, or block size.  Blocks are usually 64 bits in length, however, they will be increasing to 128 bits in the future.

The most commonly used block ciphers are DES and AES, the successor to DES.

Stream ciphers
Also a symmetric encryption algorithm that are much faster than block ciphers. During encryption, a stream cipher will generate a key or keystream using a specific sequence of bits.  In order to encrypt the plaintext, the stream cipher will combine the keystream with the plaintext that is to be encrypted.  This is usually done via bitwise XOR operations.

The most commonly used stream cipher today is RC4, also know as ARC4/ARCFOUR (Alleged RC4) or just “Rons Code” 4.

Padding
Two common methods of padding are bit and byte padding.  Zero padding is also available.  I won’t get into much details on it here, however, it is used in public key cryptography, such as OAEP with RSA.

This concludes part 2 of Intro to Cryptography.  In part 3, I will go into XOR operations and the fundamentals and math behind the encryption.  If there’s anything you want to see in this series, please leave a comment and let me know if you need help understanding anything I’m covering.
Thursday, February 23, 2012

Intro to Cryptography (Part 1)

Without getting into the history of cryptography I will do my best to explain basic cryptography and how it works.  Cryptography is essentially the science of mathematics using algorithms (or ciphers) to encrypt and decrypt plain text messages.  An original message that you want to encrypt is known as plaintext.  The message after it has been encrypted is known as ciphertext.  In order to encrypt the original message, it must be processed by a mathematical algorithm that results in the ciphertext.  Likewise, in order to decrypt the ciphertext, it must run through a mathematical algorithm to decrypt it back to the plaintext.

A very simple encryption algorithm is ROT13.  The name of this method comes from the method of the algorithm.  In order to encrypt the message, each character is rotated by 13 places, substituting the original letter by another letter 13 places down.  ROT13 is an example of a simple Caesar cipher that was developed in ancient Rome.

Since ROT13 uses the 26 letters in the English alphabet, 26 = 2 x 13, ROT13 (rotate by 13 places) is it’s own inverse.  So in order to decrypt a message encoded with ROT13, you just rotate the letters by another 13 places achieving the original plaintext message.

ROT13 character set
ABCDEFGHIJKLMNOPQRSTUVWXYZabcdefghijklmnopqrstuvwxyz
NOPQRSTUVWXYZABCDEFGHIJKLMnopqrstuvwxyzabcdefghijklm

 To understand this better, take a look at the below table:

So, if I were to take the word, password and encode it with ROT13, we would be left withcnffjbeq

There are variants of ROT13, such as ROT47 which uses the 26 character alphabet, and also includes numbers and common symbols.

ROT47 character set
!"#$%&'()*+,-./0123456789:;<
PQRSTUVWXYZ[\]^_`abcdefghijk

=>?@ABCDEFGHIJKLMN
lmnopqrstuvwxyz{|}

What would our password be when encrypted by ROT47?

This concludes part 1 of Intro to Cryptography.  In part 2 we will be diving into slightly more complicated cryptography and introduce a few new concepts.  If there’s anything you want to see in this series, please leave a comment and let me know if you need help understanding anything I’m covering.

xEVD 7F? E@ =62C? 4CJAE@8C2A9JP

Friday, February 17, 2012

Seperating yourself from the herd

Perhaps this could also be entitled: How to specialize and carve a niche for yourself while becoming a subject matter expert (SME).  

If you’re just getting started or thinking about jumping into Information Security as a career you may not know where to get started.  From my experience, a lot of professionals get started with conducting security assessments; whether it’s FISMA SA&A’s (formerly C&A’s) within the government realm, or Security Impact Assessments as Jr. Analysts.

SANS has put together a great list of the Top 20 Coolest Jobs in Information Security that provides a ‘How to be Successful’ blurb for each role.  Below is the list, however, I’ve stricken out the roles in the list that I don’t agree with:

  1. Information Security Crime Investigator/Forensics Expert
  2. System, Network, and/or Web Penetration Tester
  3. Forensic Analyst (this can be lumped into #1)
  4. Incident Responder
  5. Security Architect
  6. Malware Analyst
  7. Network Security Engineer
  8. Security Analyst
  9. Computer Crime Investigator (again this can be lumped into #1)
  10. CISO/ISO or Director of Security (this doesn’t happen until you’ve already shown your expertise…usually)
  11. Application Penetration Tester
  12. Security Operations Center Analyst (this is more of a hybrid of #7/#8 and only applies if you’re in a SOC)
  13. Prosecutor Specializing in Information Security Crime
  14. Technical Director and Deputy CISO
  15. Intrusion Analyst (see #4)
  16. Vulnerability Researcher/ Exploit Developer
  17. Security Auditor (being an auditor does not require specialization, generally speaking)
  18. Security-savvy Software Developer
  19. Security Maven in an Application Developer Organization
  20. Disaster Recovery/Business Continuity Analyst/Manager (related to #4)

Don’t get me wrong, SANS’s list is great and extremely helpful, however, I view it as a bit too high level.  If you really want to get into the weeds and deeper in security, I suggest following these few principles:

  1. Choose a technical area that interests you and start learning more about it; either through online articles, technical reference books, or free tutorials.  For example, if you want to get into penetration testing, I highly suggest picking up several introductory books (see my reading list post) and if you don’t know a programming language, start learning basic HTML, Perl, ASP, Javascript, Database (SQL), PHP, and XML.  These are just primers to get you started.  It helps to use multiple references for learning and pick what works best for you.  Don’t forget to practice, practice, practice!
  2. Learn a new technology; whether it’s firewalls, intrusion detection, or log analysis.  If you’re stuck in an analyst position and are looking for a way to carve that niche, knowing Cisco routing and firewall configuration principles will definitely help with transitioning over to a position as a Network Security Engineer (#7 on the list).
  3. Don’t be afraid to ask your project manager for added responsibility, or volunteer for it.  Showing that you are eager to contribute will increase your added value to the team or company, thus making you more indispensable, then say poor Billy who only does what he’s done a million times before and is essentially a paper pusher with no drive.
  4. Contributing to the security community.  Showing that you know your stuff and willing to share it with others will help make a good name for yourself.  Perhaps start off by tutoring your coworkers or when there’s a company training event, volunteer to conduct a training workshop for the company.
  5. Lastly, being a lifelong student is key.  Learning something new on a regular basis is what keeps our minds sharp.  If you are constantly learning and practicing, you will only get better and your knowledge base will only continue to grow.  This can only help your career.  When hiring someone, I take a look at what they’ve done and what they’re currently doing.  I’m not satisfied with a snapshot in time.  I want a dynamic candidate, not someone who is stagnant and happy just doing their job.

With all this being said, remember to choose what interests you and what excites you.  Don’t be satisfied with the status quo - get out there and challenge yourself!

-sC

Monday, February 13, 2012

SCADA Security for Critical Infrastructure (part 1)

Within the past two years, the term SCADA has begun to be thrown around as a common occurrence, however, SCADA has been around for 50 years or so, since the 1960’s.  SCADA is not new, however, due to recent events such as the emergence of Stuxnet, SCADA has been thrust into the limelight of building automation and security for critical infrastructure.
SCADA architectures can be classified into three categories:
  1. Monolithic (1st gen SCADA)
  2. Distributed (2nd gen SCADA)
  3. Networked (3rd gen SCADA)
A Networked SCADA architecture is what most of the systems today are running as; which is where the concern about security comes from.

The first step towards securing SCADA systems (aside from JFK’s 1963 memorandum establishing the National Communications System (NCS)), was Reagan’s 1984 Executive Order 12472, Assignment of National Security and Emergency Preparedness (NS/EP) Telecommunications Functions.  In short, some of the more important NS/EP requirements include: enhanced priority treatment for voice and data services, secure networks, restorability, international connectivity, interoperability, mobility, nationwide coverage, survivability, voice band service in support of presidential communications, and scaleable bandwidth.

SCADA systems usually consist of the following:
  • Field data interface devices (RTU’s, PLC’s), which interface to field sensing devices and local control switchboxes and valve actuators.
  • Comm systems (radio, cable, satellite, etc) used to transfer the data between the field data interface devices and control units and the computers within the SCADA central host.
  • Central host computer server(s) (sometimes called a SCADA Center, master station, or Master Terminal Unit (MTU)
  • A collection of standard and/or custom software (sometimes called Human Machine Interface (HMI) software or Man Machine Interface (MMI) software) systems used to provide the SCADA central host and operator terminal application, support the communications system, and monitor and control remotely located field data interface devices.
The field data interface devices are essentially the ‘eyes and ears’ of a SCADA system.  In order to make sense of the data being gathered by these devices, remote telemetry units (RTU’s) are used to provide an interface between the field data interface devices (think water flow meters, alarm states, valve positions, etc) and the SCADA system.  HMI/MMI software allows workers to monitor the devices in the field and provides dashboard like interfaces or command-line methods of doing so.  This is where a malicious attacker can conduct surveillance on critical infrastructure, or even alter the field devices by changing configurations or launching attacks against them.

This concludes part 1 of SCADA Security for Critical Infrastructure.  Stay tuned for part 2 next week where I will outline vulnerabilities within HMI/MMI software, show real-world examples (with screenshots) and provide a rundown of popular exploitation methods.

Friday, February 10, 2012

Setting up a pen test lab

If you Google for this very same topic, you will be rewarded with a dozen different ways to do this.  My goal here is not to add to the collection of articles on the web with an ideal setup for you.  The purpose of this post is to show you how I setup my own pen testing lab for my purposes.

First things first, when setting up a lab, I determine what my goal for the lab will be.  In this case, pen testing.  Pen testing what?  Great question, glad you asked.  My goal with this lab setup is to create an environment that is extremely similar to what you may find in the wild within any organization’s infrastructure.  This includes a mix of Windows servers and workstations, Linux, Oracle Application Servers, Databases and the like.  Luckily it is pretty easy to do this, and can be done extremely cheap, if not for free.

My first step would be to download and install the latest virtualization software.  In the past I used to use an offering from VMware, however, for quick setup and maintenance, I find Oracle’s Virtualbox to be my cup of tea.  After installing Virtualbox, my next step is to create virtual machines that will serve as my attack targets.
Here’s a brief listing of places I use to find my possible targets:
For my testing purposes, I will always download the 32-bit architecture (unless it’s a 64-bit only server) of an image and load it into Virtualbox.  Using the aforementioned ground breaking internet search engine, Google…you can find tutorials on how to do such a thing.

After creating the virtual machine and installing my images, I want to also create an attack machine(s) to be used against these targets.  Keep in mind, every virtualization software is different, in Virtualbox, we want to make sure that all our targets and attack machines are set to use the ‘Internal Network’ only.  This way they can all communicate with each other within the virtual environment.  If you don’t adjust this setting you will find very quickly that you won’t be able to test properly.

My attack machines include:
  • Dedicated BackTrack 5 R1 VM - this comes with the metasploit framework (don’t forget to msfupdate!)
  • Dedicated WinXP VM to run windows only tools such as Cain & Abel
  • Dedicated Web App Testing VM - contains Burp, Firefox w/ specific pen testingaddons and more, Nessus, skipfish, etc
  • OS X running another instance of Virtualbox w/ BackTrack 5 R1
  • great list of more live CD’s for pen testing attack machines
My recommendations:
  1. Virtualize everything if you can, sometimes you can’t virtualize it all, but it cuts costs down.
  2. Make sure the host computer you are using has plenty of hard drive space and plenty of RAM.  (I highly suggest 8GB of memory)
  3. Dual monitor setups are your friend.  You can do more, however, I find 2 works nicely.
  4. "A penetration tester is only as good as his/her tools" is only partly true.  Compiling a great collection of tools and other resources is extremely helpful, however, being able to master them is what separates script kiddies from true professionals; and
  5. Knowledge of scripting languages is extremely helpful: Perl, Python, Ruby, and Tcl are great!
  6. If you run into problems or have questions, search for answers!  Don’t give up, and if all else fails, ask me a question (see the link on the sidebar to the right)
Keep in mind this is not an exhaustive ‘tutorial’ or ‘guide’.  This should merely server as a launching point for you to start your adventures.  As with any ‘guide’, your mileage may vary, and you should adopt and adapt any of the information within this post as you see fit that suits your needs.  There is a myriad of different ways to setup a lab, there is no ‘right way.’

iPhone as a platform for pen testing

Before I get into the nuts and bolts, please familiarize yourself with: iPhone Jailbreak Videos: A Legal Primer and a How-To (Wired) as well as U.S. Declares iPhone Jailbreaking Legal, Over Apple’s Objections.  Also bear in mind, while related, this is not about conducting penetration testing against iOS devices or applications on iOS.  Now that you understand what you’re getting into, let’s get to it.

In my case, I upgraded to a newer phone and found my iPhone 3GS was just wasting away in a drawer.  Having jailbroken it in the past, I figured I might as well get some use out of it and incorporate it into my tool chest.  If you’ve never performed an iPhone jailbreak this might be a little tough to fully understand at first, but thankfully it has gotten a lot easier lately.  Most jailbreaking these days can be performed with a single action, instead of jumping through hoops.

Check out the below links to get you started:
Tip: To find the iOS version your device is running, plug it in to your computer and open iTunes, click your device and it should tell you the current version level.

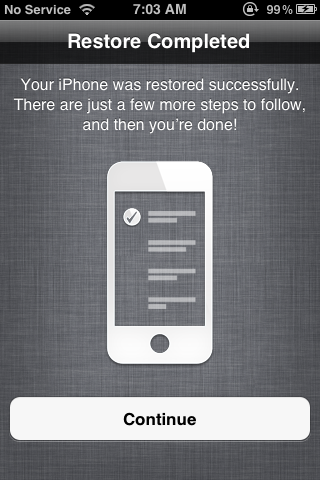
In my case, I was running iOS 4.3.5 on my iPhone 3GS.  Instead of taking time to find the right software to jailbreak it, I upgraded my phone to the latest iOS 5 version which the latest jailbreak software out there can handle no problem.  Less than 5 minutes later my device had been released from Apple’s restrictions.

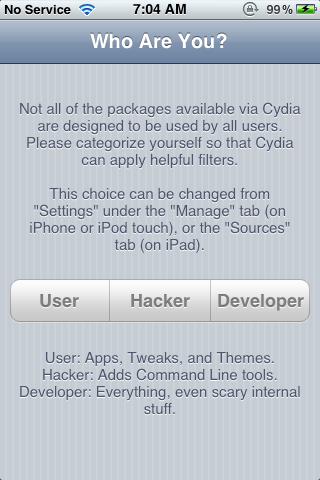
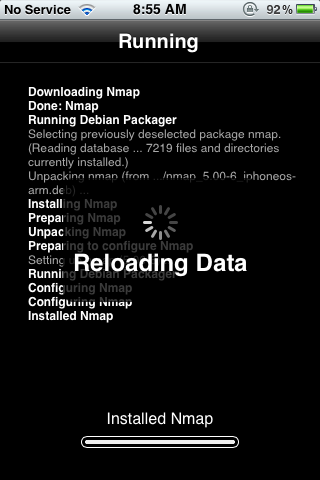
Once it booted back up, I launched Cydia (see above), a package manager/repository for utilities and applications. Take a look around and see what you can find, here’s a short list of what to look for:
  • OpenSSH (great for manipulating the device remotely)
  • Inetutils (ftp, inetd, ping, rlogin, telnet, tftp)
  • Network-cmds (arp, ifconfig, netstat, route, traceroute)
  • cURL / Wget
  • Stealth MAC
  • Stunnel
  • tcpdump
  • NMAP
  • MobileTerminal
  • Ispeedtouched (wifi scanner + rainbow tables for WAP)
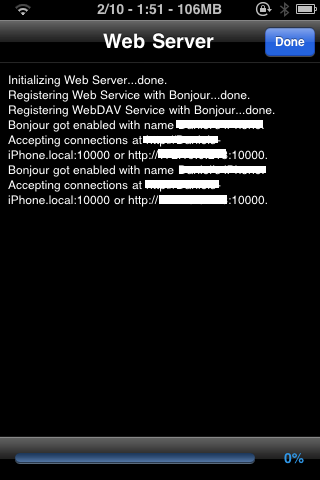
  • iBrowser (temporary web server from your iPhone)
  • iFile (browse contents of your device, also has web server capabilities)
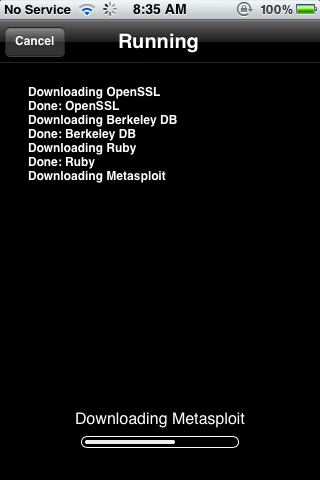
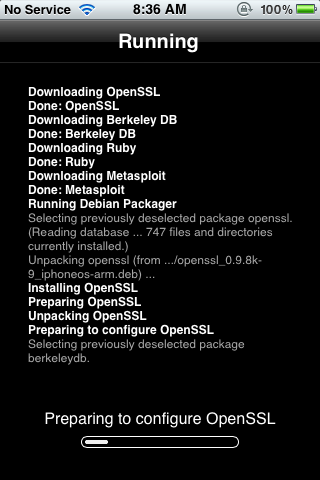
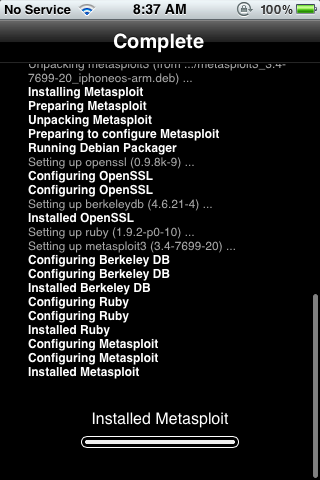
  • metasploit (yup, you can put it on your phone)
Here’s a little bit of eye candy after the jailbreak was completed:

Saturday, February 4, 2012

Vulnerability Research Resources

As mentioned in the previous post, staying abreast of the latest (and greatest depending upon how you look at it) vulnerabilities out there is a vital aspect in maintaining your knowledge as a competent security professional.  While there are different aspects of cyber security, all with their own underlying importance of understanding various technologies; as a cyber security engineer and penetration tester, I find it extremely important for us to say informed of these issues.

With that being said, I’ve included a list of what I commonly use for my vulnerability research.

Full Disclosure and BugTraq (SecLists)

Twitter is also a very good resource for breaking security and vulnerability news, here’s a few to get you started:


Friday, February 3, 2012

What it takes to be an "ethical hacker"

Forget all the glitz and glamour that Hollywood would lead you to believe.  Being an “ethical hacker” (sic penetration tester) as a profession is an extremely difficult job with its fair share of ups and downs.

As a pen tester you are required to be the foremost technical subject matter expert on many different topics.  Businesses, organizations and large corporations rely on you to not only find every vulnerability within their architecture (hardware AND software), but also give them accurate and precise information on how to protect themselves and mitigate these vulnerabilities.  This requires you to understand the underlying technology behind networking, specific server OS’s and how they integrate with the application layer, services and middle-ware, etc.

Without knowing these things you cannot be a successful pen tester; the onus is on us to learn as much as we can all the time as the environment we are working within is ever evolving.  We have to wear the hat of a programmer occasionally, requiring us to know scripting languages, we have to be experts in COTS tools as well as open source tools.  We also have to be technical writers, as what good is finding vulnerabilities if we don’t report them.

If you want to be a truly successful “ethical hacker”, penetration tester, cyber security engineer, etc it is up to YOU to learn as much as you can all the time. The satisfaction you can feel once you reach a certain level of knowledge and practical skills can be awe-inspiring, however, when you snap out of it you start to feel as if you truly know nothing again as everything is changing around you constantly with new research in different fields progresses, or new technologies emerge.

Becoming a student for life is key.  Through dedication and persistence you can accomplish anything.

P.S. I hate the term "ethical hacker" - let's ditch the buzz word...

- sC